Creating Rangoli, a traditional Indian art form, can be a delightful way to celebrate festivals or simply enhance your home’s aesthetic. With simple:3lveupw7rhy= Rangoli Design, you can achieve impressive and beautiful designs without needing advanced skills or extensive materials.
This guide will walk you through various techniques and tips to help you master simple Rangoli designs, making the process both enjoyable and straightforward.
What is Simple:3lveupw7rhy= Rangoli Design?
Simple:3lveupw7rhy= Rangoli Design refers to easy-to-execute Rangoli patterns that are accessible to everyone, even those who are new to the art form. These designs are simplified versions of traditional Rangoli, focusing on basic shapes and patterns that require minimal effort and materials.
By breaking down complex designs into simpler components, these methods make Rangoli more approachable and less time-consuming.
Why Choose Simple Rangoli Designs?
Opting for simple Rangoli designs comes with several advantages:
- Ease of Execution: Simple designs reduce the complexity involved, making them perfect for beginners or those with limited time.
- Quick Setup: These designs can be created in a shorter amount of time compared to more intricate patterns, making them ideal for last-minute preparations.
- Minimal Materials: Simple designs often require fewer materials, reducing costs and making them more accessible.
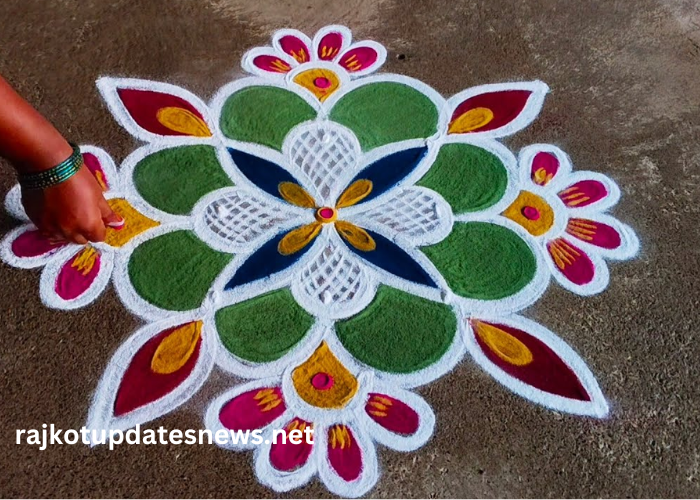
Example: Flower Pattern vs. Geometric Pattern
- Flower Pattern: Uses basic floral shapes that are easy to draw and fill in with color.
- Geometric Pattern: Employs simple geometric shapes like circles and triangles to create a visually appealing design.
How to Start with Simple Rangoli Designs
Starting with simple:3lveupw7rhy= Rangoli Design involves a few fundamental steps:
- Gather Materials: Basic materials include Rangoli powders (or colored rice flour), a clean surface, and optionally, stencils or a chalk pencil.
- Choose a Design: Opt for a simple pattern like dots or basic shapes to get started. Geometric designs or simple floral patterns are great choices for beginners.
- Prepare the Surface: Ensure the floor or area where you will create the Rangoli is clean and smooth. A clean surface will help in achieving clearer lines and a better finish.
- Outline the Design: Using chalk or a pencil, lightly sketch the design on the surface. This will serve as a guide for applying colors.
- Apply the Colors: Fill in the outlined design with Rangoli powders, using brushes or your fingers to apply the color evenly.
- Add Finishing Touches: Once the primary colors are in place, you can enhance the design with additional details or patterns if desired.
Common Techniques in Simple Rangoli Designs
Dot-Based Patterns: Dot-based Rangoli involves creating a grid of dots on the surface. These dots are then connected with lines or filled in with colors to form intricate patterns. This technique is simple to execute and helps in creating symmetrical designs.
Freehand Drawing: Freehand Rangoli allows for more creativity as it involves drawing patterns directly without a predefined structure. This method is ideal for those who want to add a personal touch to their designs and experiment with various shapes and motifs.
Table: Comparison of Rangoli Techniques
| Technique | Ease of Use | Detail Level | Time Required |
| Dot-Based | Easy | Moderate | Short |
| Freehand | Moderate | High | Variable |
Tools and Materials for Simple Rangoli Design
When working with Rangoli, having the right tools and materials is essential. Here’s a comparison of common tools used:
| Tool/Material | Purpose | Examples |
| Rangoli Powder | Coloring and designing | Colored rice powder, chalk |
| Stencils | Creating uniform patterns | Plastic or paper stencils |
| Brushes | Detailing and fine lines | Small artist brushes |
Note:
Ensure that the Rangoli powder is non-toxic, especially if children or pets will be around.
Reminder:
Practice your design on paper before transferring it to the surface to get a feel for the pattern and colors.
Steps to Create a Simple Rangoli Design
- Choose a Design: Start with a straightforward pattern that aligns with your skill level and the occasion.
- Prepare the Surface: Clean the area where you will create your Rangoli to ensure a smooth application.
- Outline the Design: Sketch the pattern lightly on the surface to guide your coloring.
- Fill in the Colors: Apply the Rangoli powder or other materials within the outlines, using brushes or your hands.
- Enhance the Design: Add any extra details or touches to complete the look.
Example Designs
- Geometric Patterns: Patterns involving simple shapes like squares, circles, or triangles. For example, a design with concentric circles or interlocking triangles can be very striking and easy to execute.
- Floral Patterns: Designs that mimic flowers or leaves. These can be simple daisies or tulips arranged in a repeating pattern, creating a vibrant and festive look.
Tips for Perfecting Simple Rangoli Designs
- Practice Regularly: Regular practice helps in improving your precision and creativity. Try different patterns to enhance your skills.
- Use Quality Materials: High-quality Rangoli powders and tools will result in more vibrant and lasting designs. Invest in good materials to get the best results.
Table: Comparing Rangoli Design Materials
| Material | Quality Indicator | Impact on Design |
| Rangoli Powder | Bright Colors | Enhanced Vibrancy |
| Stencils | Durable Material | Consistent Patterns |
| Brushes | Fine Bristles | Detailed Finish |
Conclusion
Embracing simple:3lveupw7rhy= Rangoli Design opens up a world of creativity and decoration without requiring extensive skill or materials.
By focusing on straightforward techniques and designs, you can effortlessly add a touch of elegance and festivity to any occasion. Whether for a festival or a casual gathering, simple Rangoli patterns are an accessible and enjoyable way to brighten up your space.
FAQ’s
- What materials are needed for simple Rangoli designs?
You need Rangoli powder (or alternatives like colored rice), chalk or a pencil for outlining, and brushes for detailing. - How long does it take to create a simple Rangoli design?
Typically, it takes about 30 minutes to an hour, depending on the complexity of the design and your experience level. - Can I use everyday items for Rangoli designs?
Yes, colored rice, flower petals, and even sand can be used as alternatives to traditional Rangoli powders. - Are there any specific patterns recommended for beginners?
Geometric shapes like circles and triangles, or simple floral designs, are recommended for beginners due to their ease of execution. - How do I maintain my Rangoli design?
Keep the area clean and avoid disturbing the Rangoli. If needed, cover it with a protective sheet to preserve the design longer.